The benefits of variable resistance in training
Strength and conditioning coaches are always searching for ways to improve the equipment they have been blessed (or cursed) with.
Some prefer free weights, others are more receptive to machines, while coaches like myself will incorporate all kinds of modes.
One advantage that exclusively designed machines provide is variable resistance. Variable resistance is a built-in mechanism-via a cam or leverage linkage system-that manipulates the resistance to better accommodate what is known as the strength curve.Physiologically speaking, there are various morphological, biomechanical, angular, and a host of other considerations related to the body’s system of levers that enable us to demonstrate diverse degrees of strength.
Simply put, when performing a strength training exercise, we are “stronger” at certain points along the movement path and “weaker” at others.
The so-called “sticking-point” in the supine barbell bench press provides a universal example. In this movement, many trainees are at a biomechanical disadvantage in the short distance from where the bar touches the chest to the position where the upper arms are parallel-or slightly beyond parallel-to the bench.
Athletes with exceptionally long arms face this dilemma every time they perform this and other pressing movements, due to the increased work requisite (i.e., work = force X distance). Longer arms mean a greater distance for force application and, therefore, more work. Usually, once their upper arms extend beyond the parallel position, they are in a more advantageous alignment, and the lift can be successfully completed.
Machines that are designed to address these inherent problems will provide more resistance at the points of greater strength advantage, and less at the junctures of diminished advantage. Hence, the term variable resistance.
While it is impossible to ideally match everyone’s exact points of mechanical advantage and disadvantage along their specific strength curve, the slight variance in resistance usually provides the lifter with a more evenly distributed load throughout the exercise’s range of motion. This curve, in turn, aids in prolonging the set and the duration of the target musculature under tension, which will increase the overall stimulus.
What can be done if you would like to implement this concept on occasion, but are a free weight purist, or simply don’t have the right machine designs in your facility to do so?
Enter flex bands
One very effective, efficient, and budget-friendly strategy for incorporating this concept is the inclusion of flex bands. Flex bands are easy to transport around the room and can be applied to just about any type of equipment.
The bands come in a workable variety of sizes and strength. They can be used as the sole source of resistance on the bar/machine or with additional weight plates.
The mechanism of band tension is simple: As the band is stretched more tension is placed on the bar/machine arm, which gradually increases resistance to the lift.
When the band is in a relaxed mode, less tension is applied, which decreases the resistance.
The result is another avenue for blending variable resistance into the workout scripts.
Let’s look at just a short list of their possible applications, along with some coaching points on each.
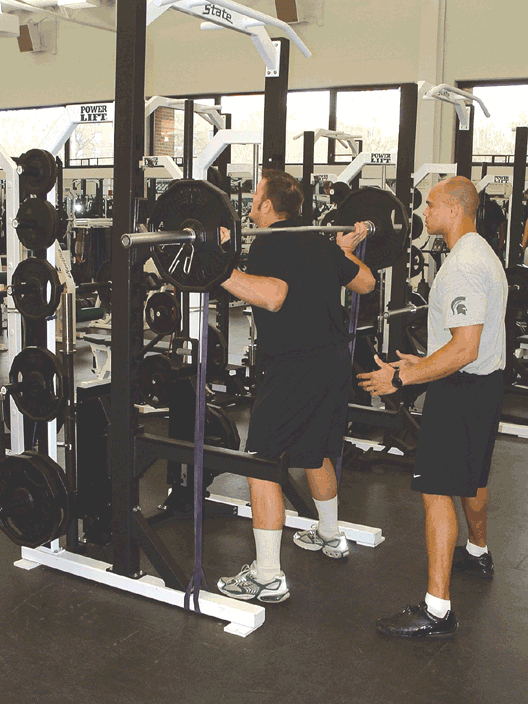 Notes: The placement of the bands on an Olympic bar is inside the revolving sleeve. This will prevent the bands from sliding outward during the execution of the exercises.
The opposite ends of the bands should be securely placed around the plate storage horns or another area on the bench, rack, or machine that provides a sturdy, safe anchor. Also, before adding additional weight plates to the bar, the athletes should orient themselves to the “feel” of the band resistance alone.
It will take a while before they adjust to the positive (raising) resistance and negative (lowering) pull provided by the bands. Initial sets on all exercises should be performed with the utmost control and care until the neuromuscular system is given an ample opportunity to encode the new skill. Over time and with experience, resistance can be added via plates or additional bands for progressive overload purposes.
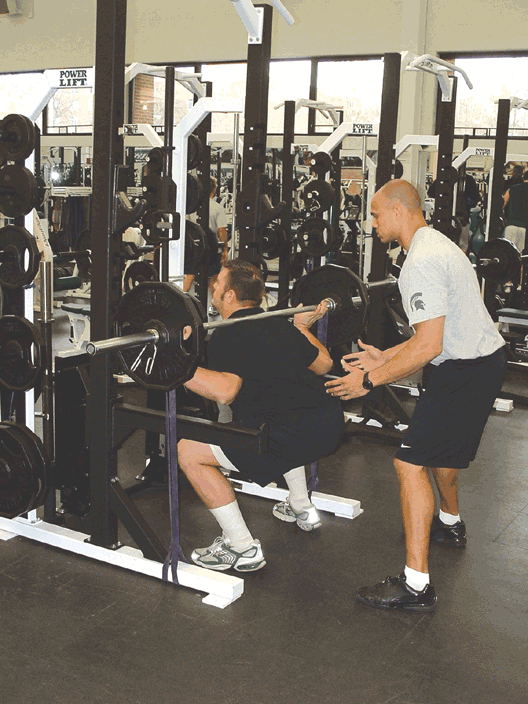 Barbell Squat: The first order of business is to carefully get the bar off the rack horns (photo 1). Understand that there will be an unusual “feel” produced by the downward and lateral pull of the bands.
Once the feet are set in the squatting position, execute a controlled descent to a mid-range position with the thighs parallel to the floor (photo 2). Maintain a relatively flat upper back with the lower back locked into its normal lordotic curve posture.
Pull the shoulders back slightly and sustain a “big chest” to assist with this appropriate back positioning. Do not allow the knees to bow out or buckle inward; keep them in alignment with the toes. From the mid-range position, begin the ascent by pushing them up through your heels and lead with the head and shoulders as the hips and legs extend.
 Coaching Point: We prefer higher rep (e.g., 10-15) sets when squatting with the bands. This approach enables us to pay close attention to technique and mechanics with a workable resistance for overload purposes.
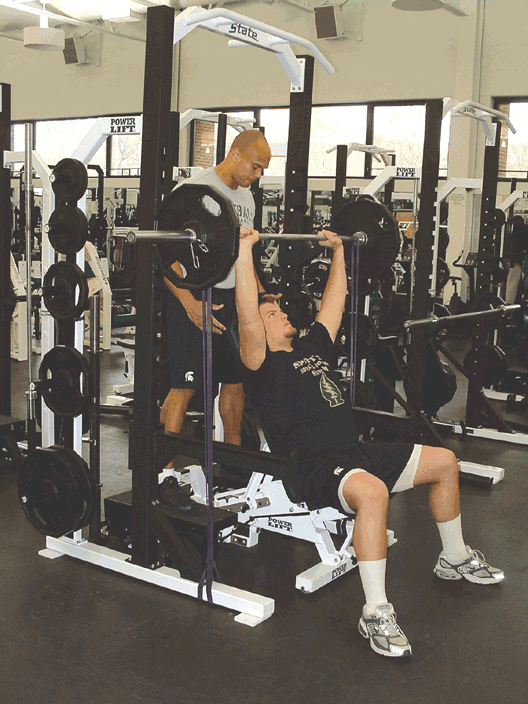
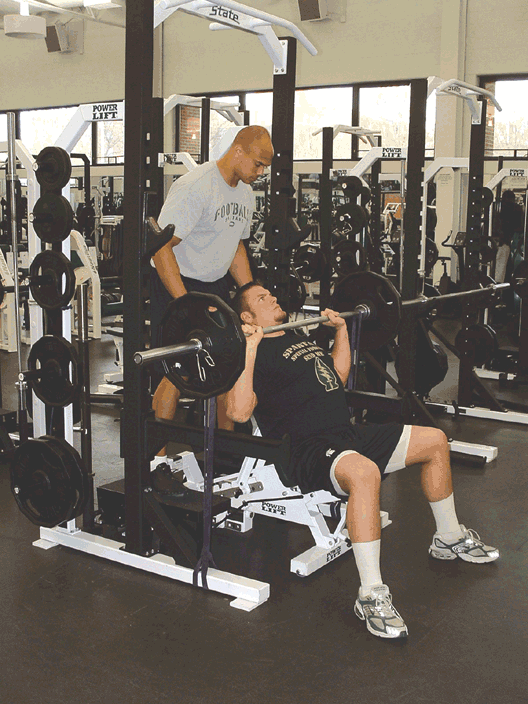
Seated Military Press: Again, take care in removing the bar from the rack horns to the starting position (photo 3). Lower the bar with control to the mid-range position between the top of the shoulders and the chest (photo 4). From there, begin a smooth, gradual press back to the top position.
Coaching Point: When performing the military press, either seated or standing, we prefer to keep the bar in front of the head during both the raising and lowering phases. This technique prevents the forceful external rotation of the shoulder complex, which can result in rotator cuff strains.
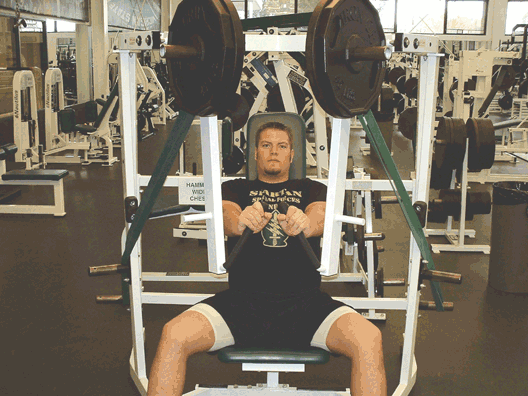
 Machine Chest Press: As we stated, the versatility of the bands encompasses a wide range of modalities. In photo 5, we’ve applied the band to a chest press machine that already has a built-in variable resistance leverage system.
As the movement arms are pressed forward, the exercise becomes increasingly more difficult. Lower the movement arms from the top position (photo 6) in a controlled fashion back to the start. Before the movement arms hit the rubber bumpers, begin the next rep. This will maintain the tension placed on the target areas.
Coaching Point: The inclusion of the bands provides an amalgam of variable resistance elements that initiate a great deal of stimulation to the working musculature of the pectorals, anterior deltoids, and triceps.
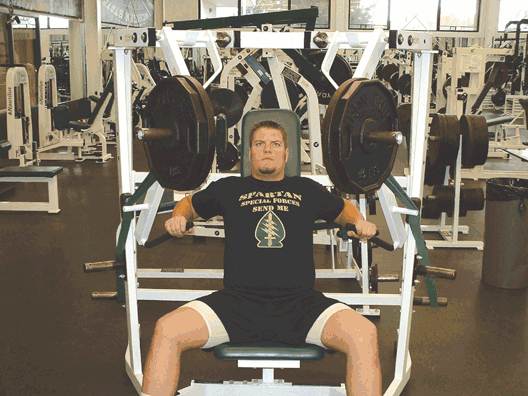 Due to the fact that you are already working with a mode that provides variable resistance, it would be wise to try the bands independently before adding any additional resistance. This will orient the lifter to the out-of-the-ordinary feel provided by the bands.
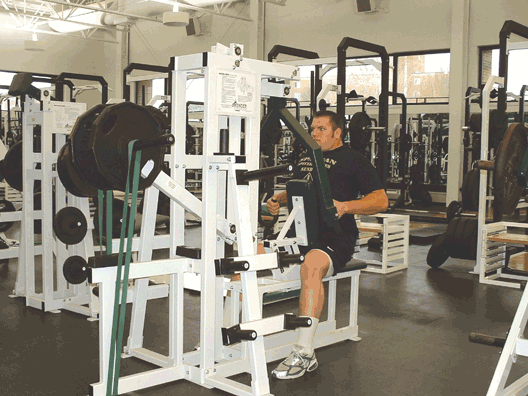
Machine Row: Advancing the same theme, the machine horizontal row (starting position shown in (photo 7) furnishes an efficient method for targeting the large upper back musculature – a neglected area in many programs.
 Pull the elbows as deep as possible in the mid-range position (photo 8), pause momentarily, and then lower the movement arms with control to the starting position.
Maintain the tension within the working musculature by starting the next rep just prior to contact with the rubber bumpers.
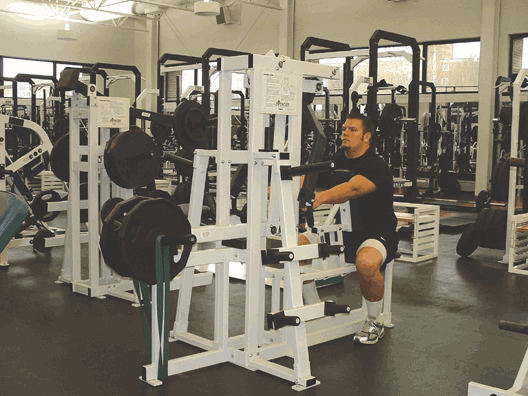 Coaching Point: It is vitally important to include an appropriate allotment of pulling movements such as this in your workout scripts. A close examination of some programs reveals a glaring omission of enough of these exercises when compared to the number of required pressing movements. This disparity in presses vs pulls can result in a strength imbalance between the anterior and posterior muscle compartments, which can be a precursor injury.
 A one-to-one press/pull ratio is ideal, if not within each workout then at least by the end of the training week.
Leg Press: If you have a leg press that will accommodate the bands, you will find this movement to be one of the most effective machine applications.
Photo 9 shows the starting position on our particular unit, while photo 10 shows the mid-range position. Press the foot board out to just short of knee lockout, pause momentarily, and then return it smoothly to the start. Before the movement arm sets down on the rubber bumper, begin the next rep in order to maintain the tension on the legs and hips.
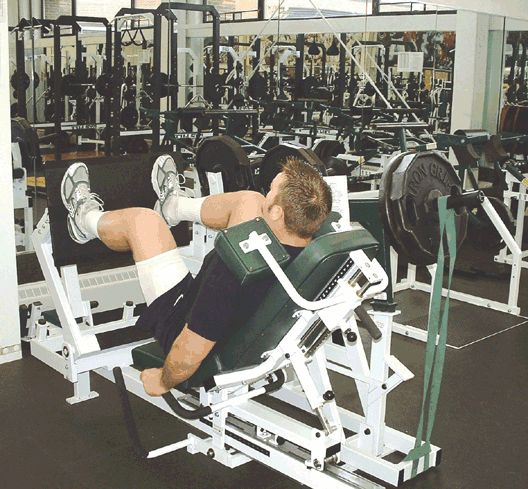 Coaching Point: The band application on the leg press is particularly effective in rehabilitation situations, where you can progress from very light, to medium, and, finally, to heavy resistance bands. We have found it to be an exceptional adjunct to other rehab procedures for the legs and hips.
As always, seek the input and direction of the medical and sports medicine staffs before including any type of exercise as an injury rehabilitation procedure.
Assisted Chin-ups: This is the solution for 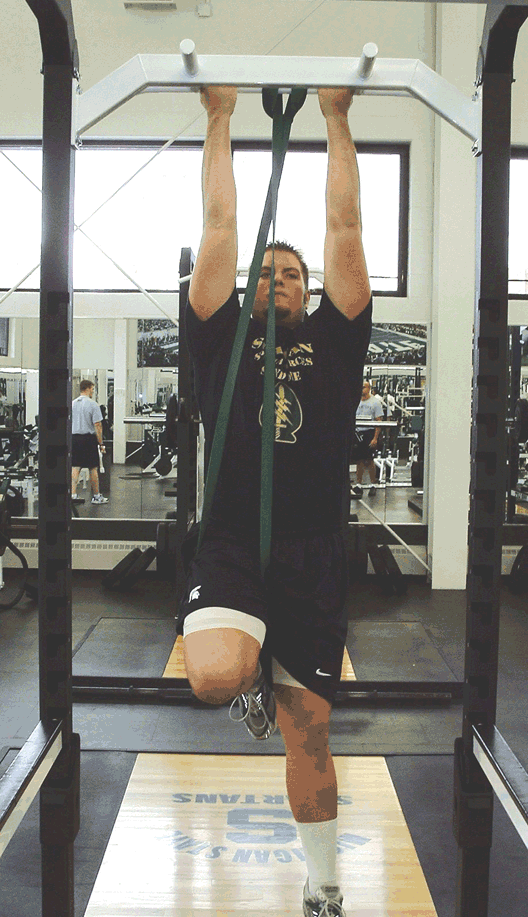 individuals who have difficulty performing this excellent body-weight exercise for the upper back and biceps. Make a slipknot around the top of the chin-up bar and be sure that it is firmly secured. Place the band of the shin area of one leg (photo 11) and keep that leg bent so that the band does not slip off.
Pull up to the point where your chin is over the bar (photo 12), pause momentarily in that position, and then slowly lower yourself to the start.
Coaching Point: Using the band in this instance serves a slightly different purpose than in the aforementioned applications. Here the band reduces the body weight to enable the lifter to complete the movement. The heavier the band, the more assistance you will receive on both the raising and lowering phases of the exercise.
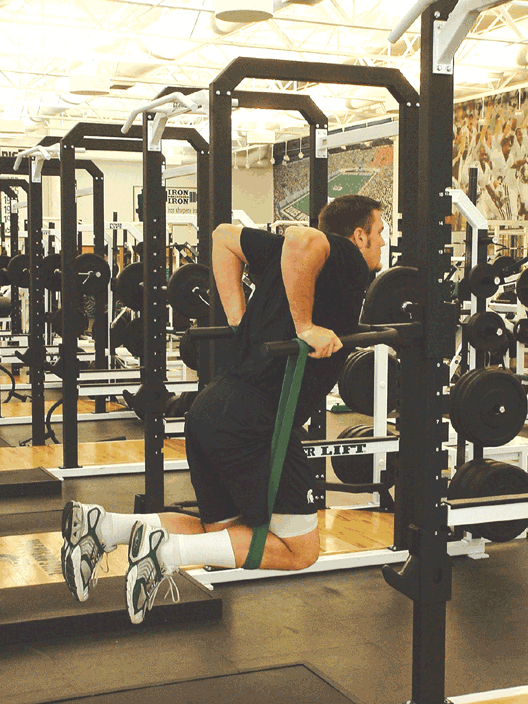
Assisted Dips: Loop the band around the dip bars and place both shins over the band in a bent-kneed position (photo 13). Lower yourself 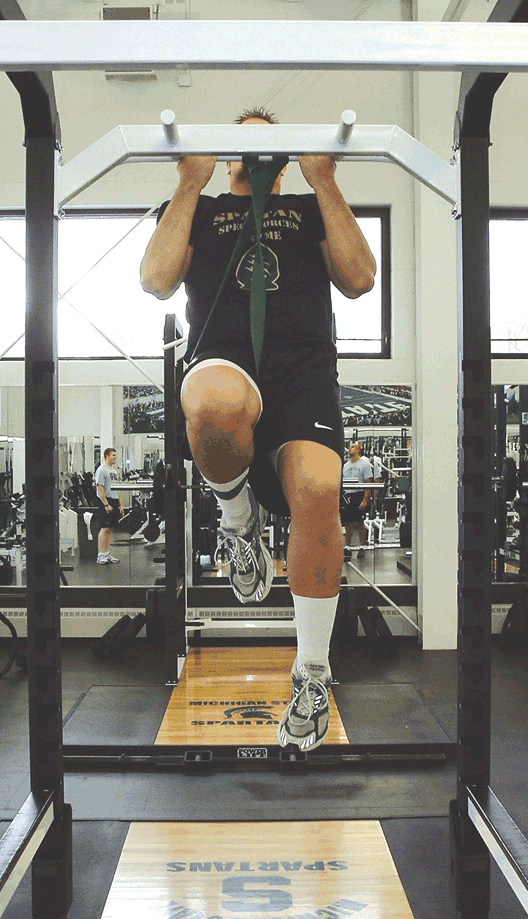 to a position where the upper arms are parallel to the floor (photo 14). Pause briefly in that mid-range position, and then return to the start.
Coaching Point: As you get stronger in the movement, you can leave one leg out of the band, which will make the exercise more difficult. The free leg can now assist with pushing off the floor when you reach muscular fatigue and want to perform some additional 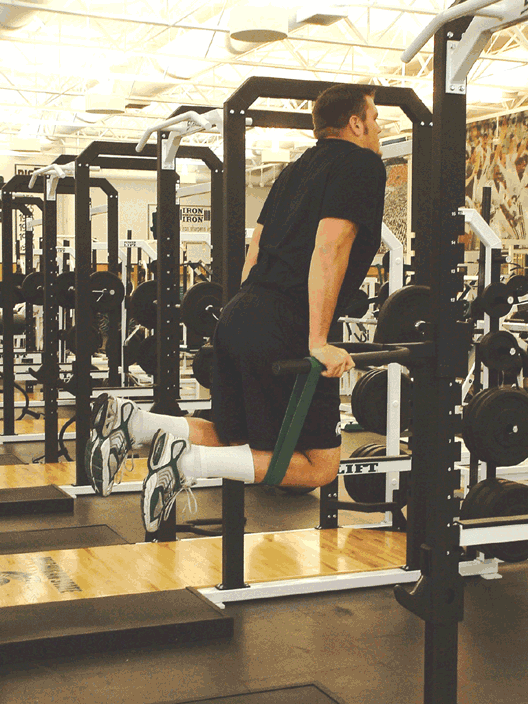 “negative (lowering) only” reps.
Final rep
We have merely scratched the surface of possibilities with this handful of band uses. The bands also provide many services as stretching aids and as individual resistance pieces.
Our athletes truly enjoy and benefit from the multitude of band applications we employ and are constantly making suggestions on new ways to incorporate them. It seems like we find a great new way to include them every day.
 We suggest that you get in tune and strike-up the band training!
For more information on the bands we use at Michigan State, contact Dick Hartzell at Jump Stretch (800-344-3539), or www.jumpstretch.com.
Tips from the trenches
Can you drink too much water? (Hydrate! Hydrate! Hydrate!) All coaches and athletes know the importance of drinking enough fluids to stave-off dehydration and heat-related illness.
However, a recent study in The New England Journal of Medicine (Almond, C., et al., April, 2005) indicates that endurance athletes (marathoners, distance bikers, tri-athletes, hikers, etc.) might be drinking too much water. The study found that athletes who drink copious amounts of fluids (on an average of 3 liters or more during the competition) actually gained weight during their competitions.
This can result in a potentially devastating condition known as hyponatremia, a situation where extra water moves into peripheral cells, including the brain cells. This can result in some severe health detriments, including unconsciousness and, in severe cases, even coma or death.
To prevent this occurrence, endurance athletes are encouraged to weigh themselves at the beginning of each training session, monitor their fluid intake during training, and to weigh themselves at the conclusion of each training session.
If they have gained weight during the training session, they should incrementally reduce their fluid intake while training and competing. While this is not a problem of epidemic proportions, there have been enough catastrophic events to warrant serious concern.
The problem seems to be more prevalent with slower athletes, who obviously have more time to drink larger amounts of fluid. Important Note: This in no way diminishes the importance of fluid intake during training, practice, and games. Remember that hyponatremia has been noted primarily in endurance athletes who tend to drink fluids frequently and abundantly.
Most athletes in shorter duration, high-intensity sports (football, basketball, ice hockey, volleyball, sprint events, etc.) do not drink fluids at the same rate or to the same level as endurance athletes. Proper hydration is still extremely vital to performance and health maintenance.


